
Event Recap: Flower Wreath Workshop
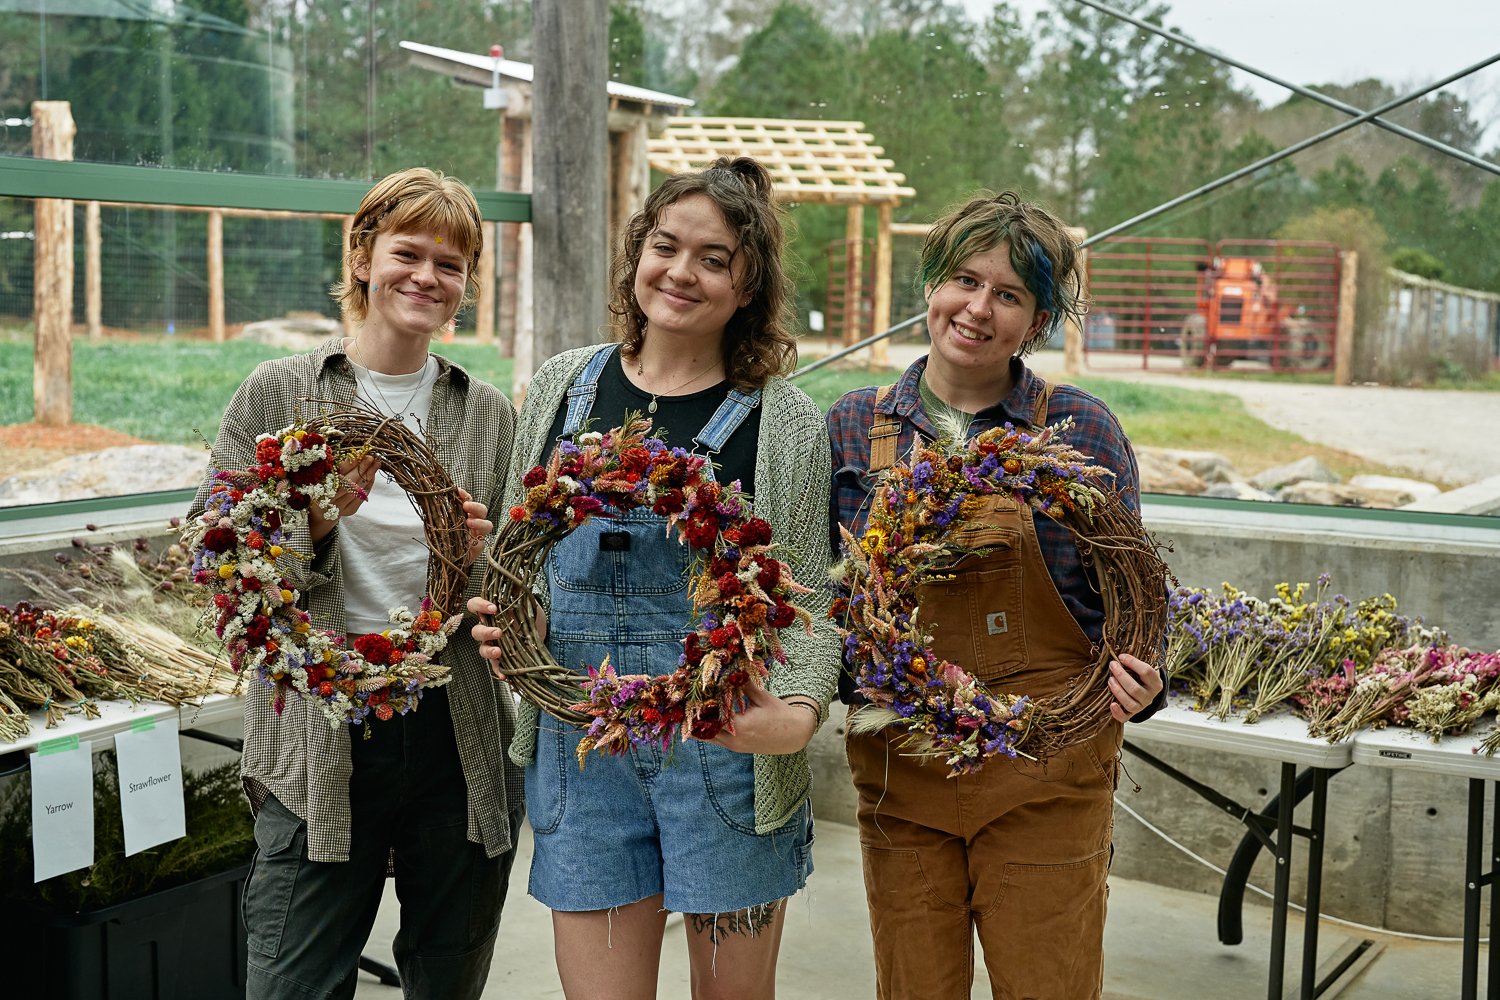
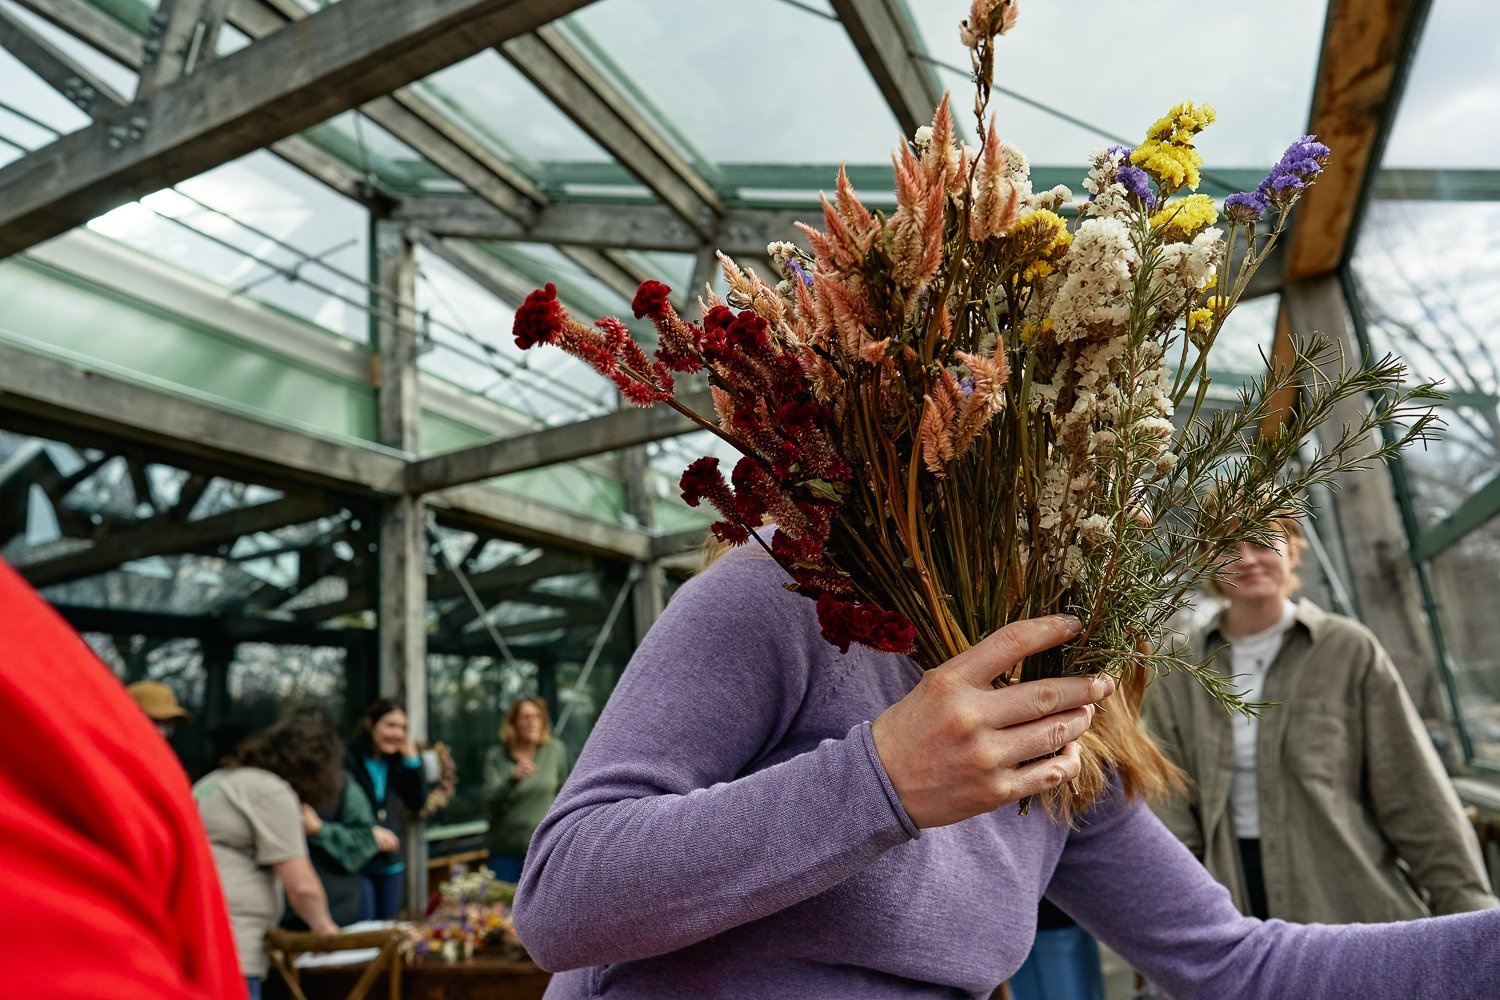
This past Saturday, we hosted our first event of 2024 in our greenhouse: a flower wreath-making workshop using dried flowers from last year’s farm harvest. Sixteen guests joined us for a morning of learning about flower farming (and its importance for pollinators), as well as the ins and outs of drying flowers and crafting dried flower wreaths. Everyone took home a beautiful wreath, and we raised some funds for the NC Wildlife Federation’s Butterfly Highway project.
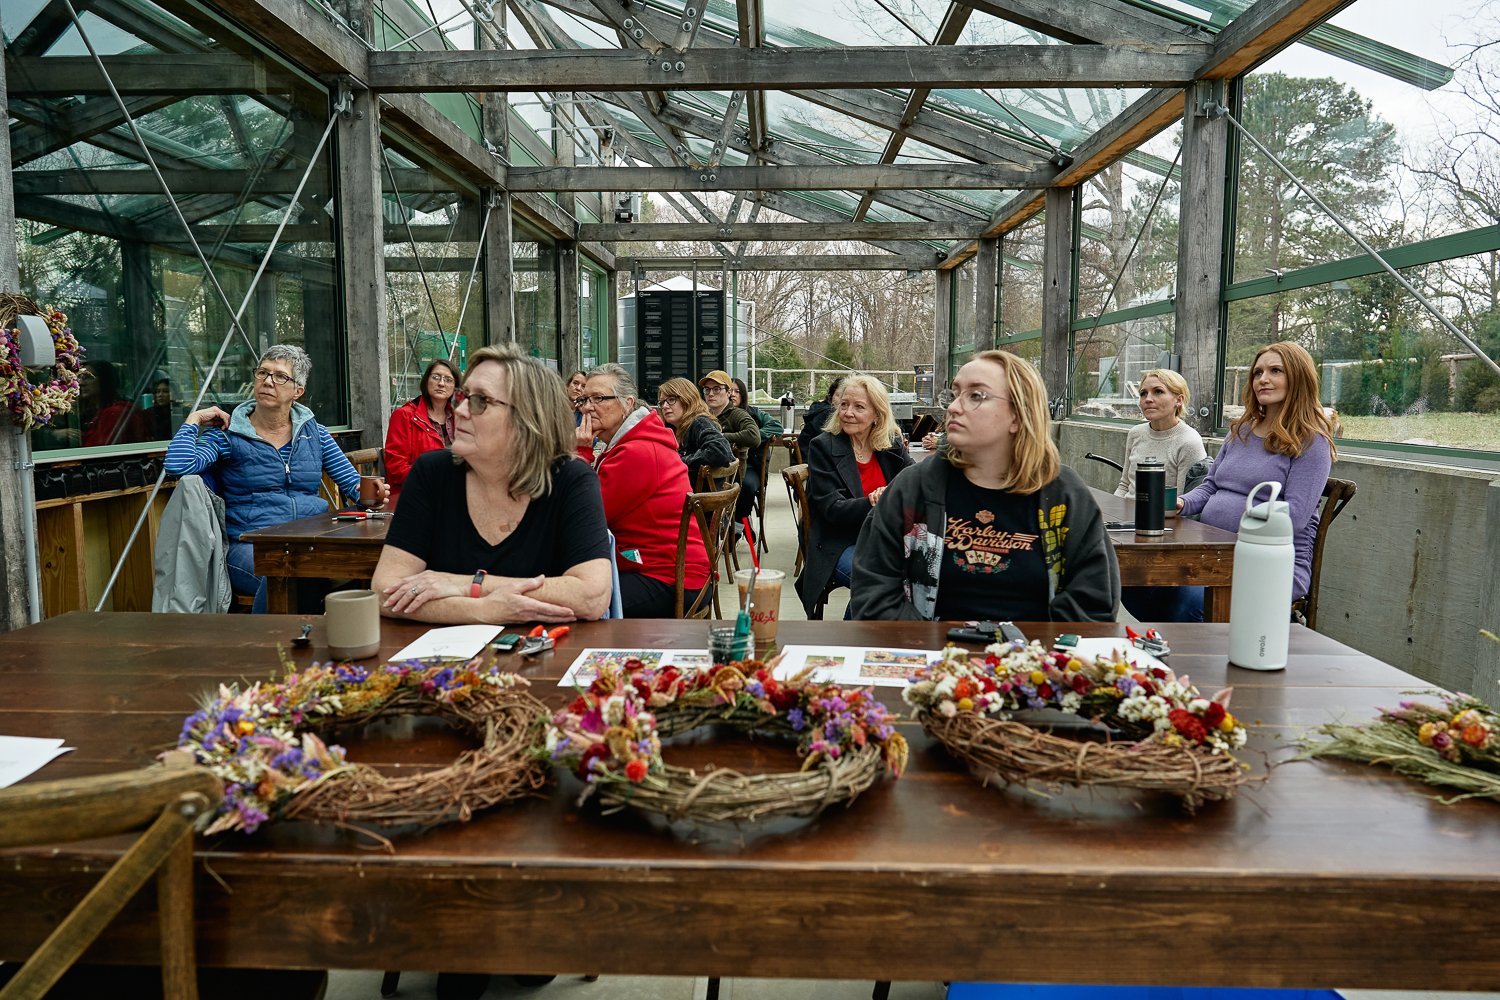


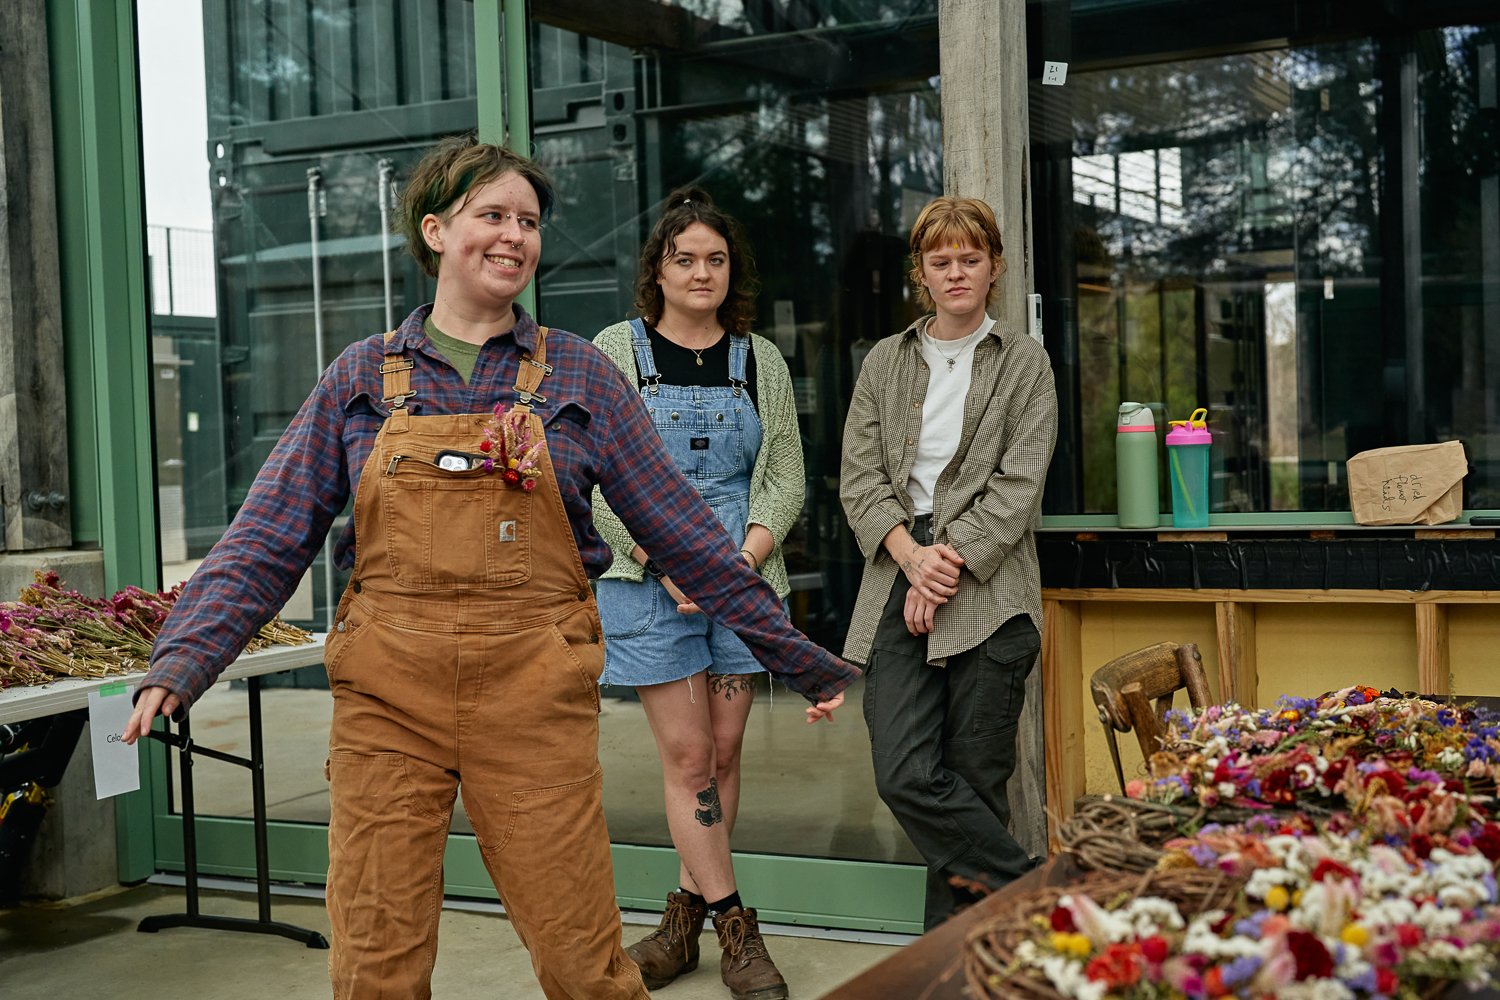

While crafting was the focus, we also enjoyed some brunch snacks featuring vegetables from the farm, and preserves from our demo kitchen. It was a fantastic morning, and we can’t wait to do it again next year!
A Burkett Guide to Dried Flower Wreaths
FLOWER FARMING
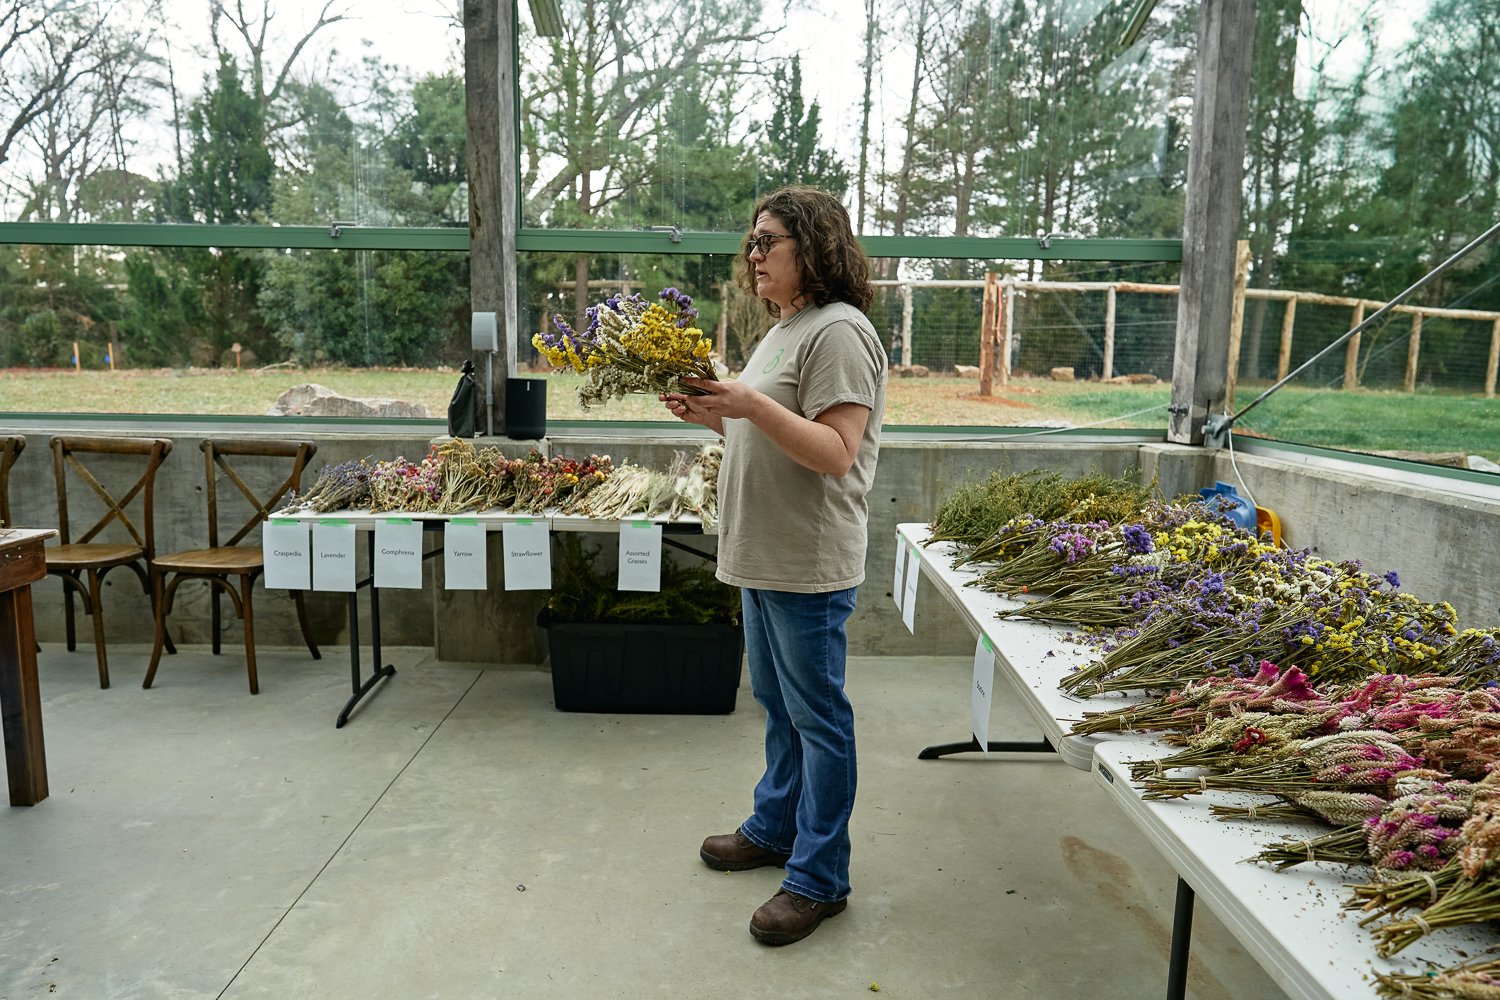
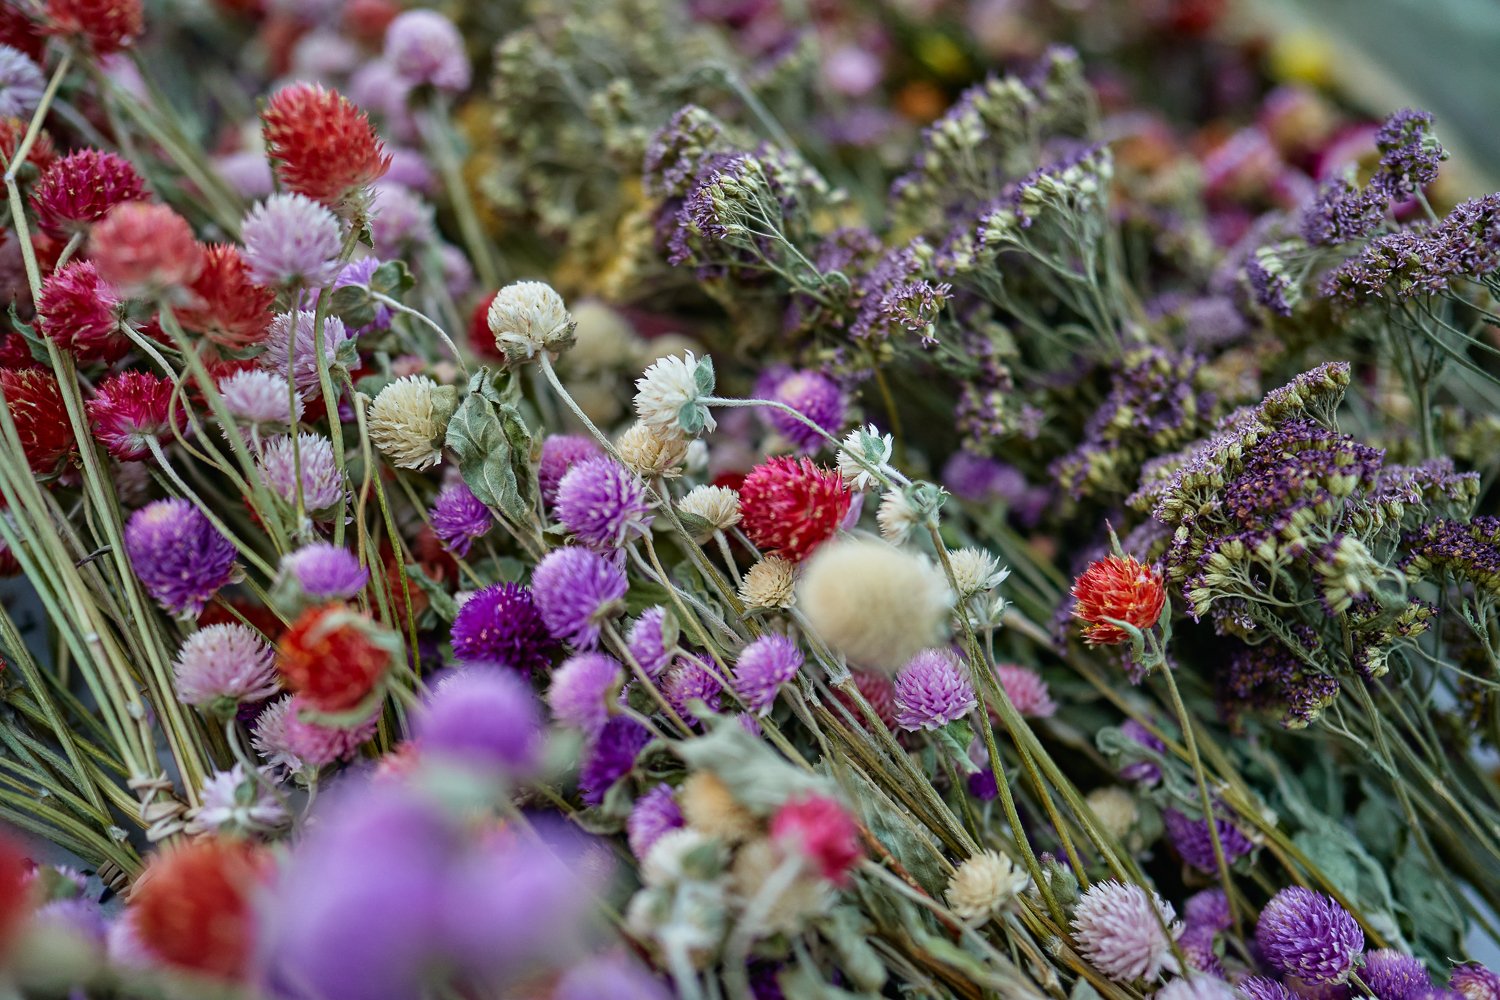
At Burkett Farm, we grow many varieties of flowers and flowering herbs. We integrate flowers into our farming plan because they provide food and habitat for beneficial insects, and contribute to the biodiversity of our eco-system. We also donate flowers to the Flower Shuttle, and sell flowers to local florists in exchange for an in-kind donation to a community non-profit. In 2023, we harvest 1,400 bundles of flowers!
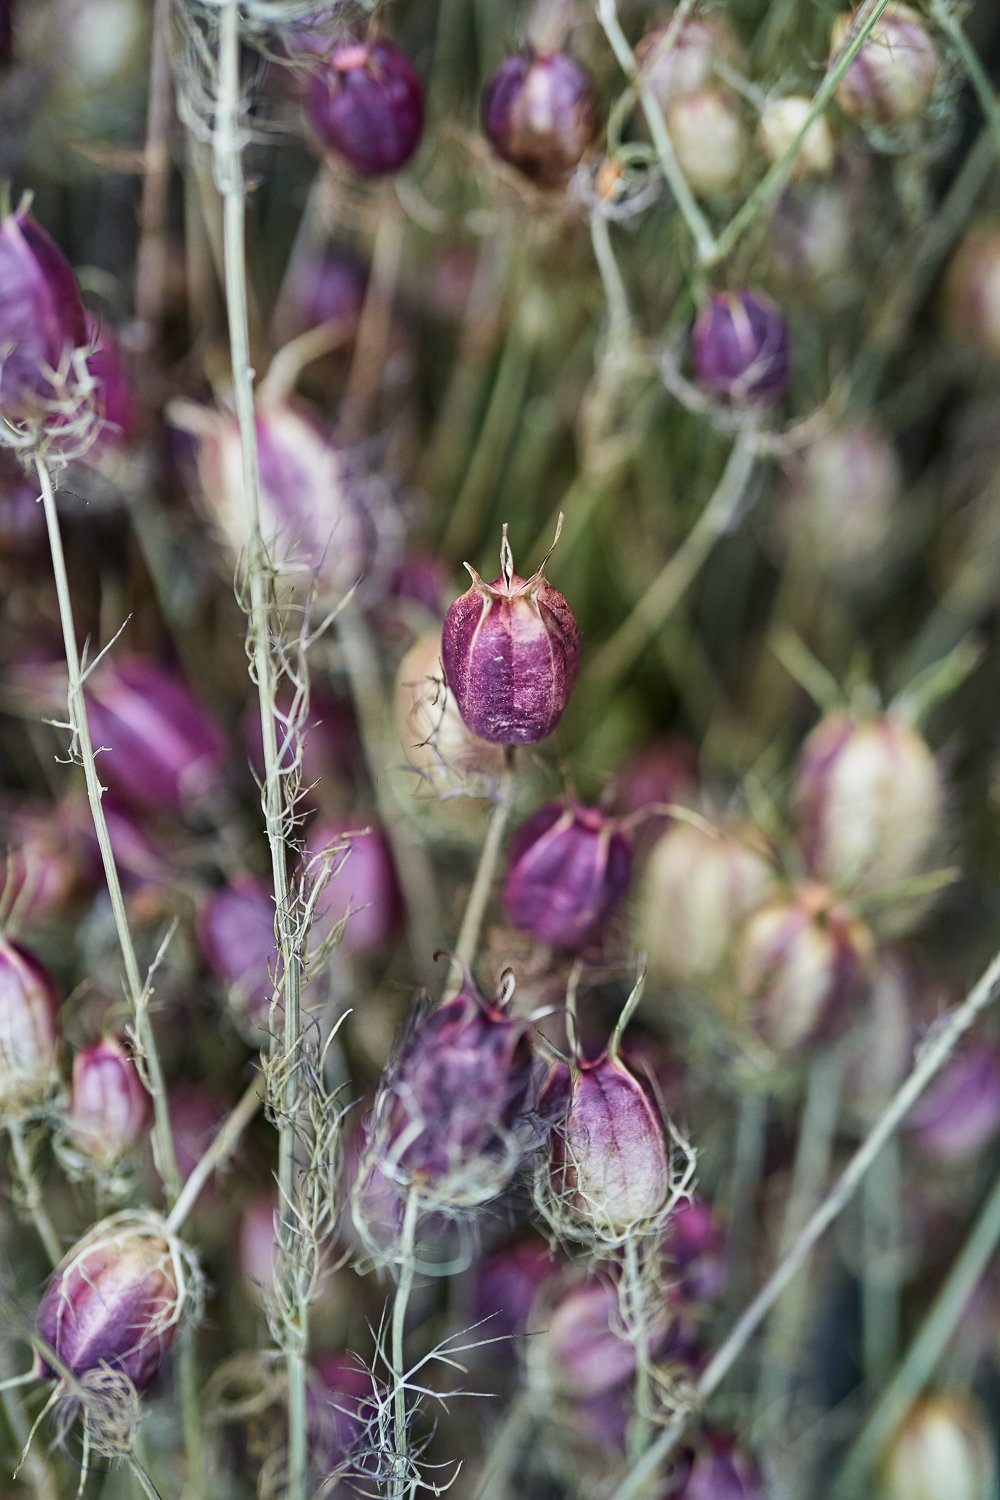
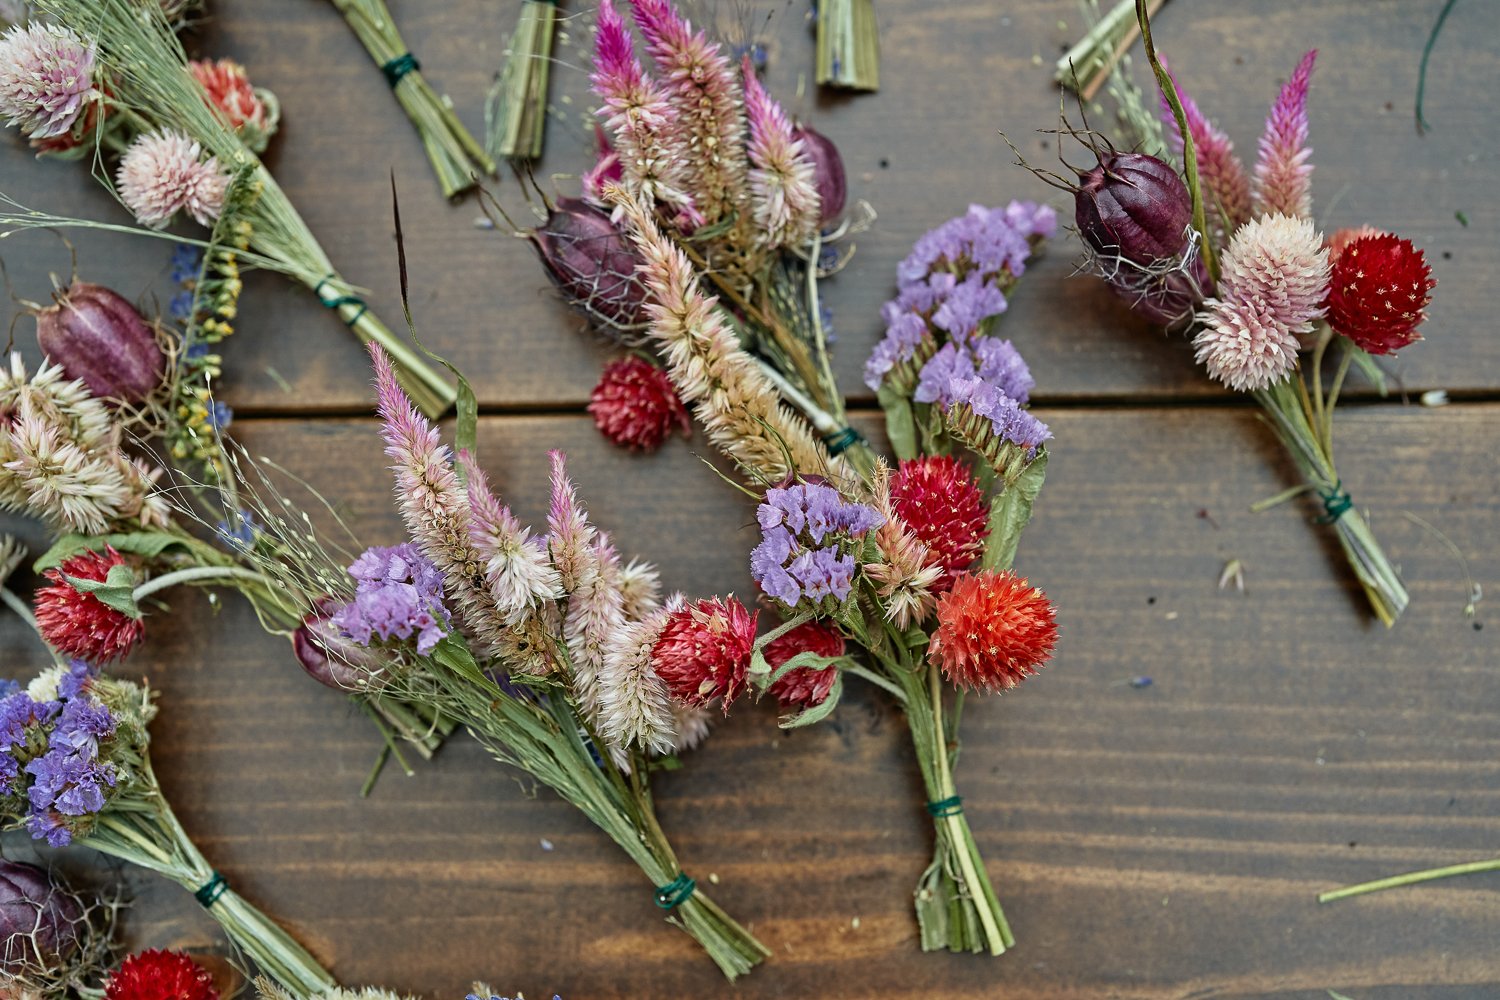
Here is a list of flowers to grow for pollinators that ALSO make good dried flowers (and grow well in our climate):
Statice
Gomphrena
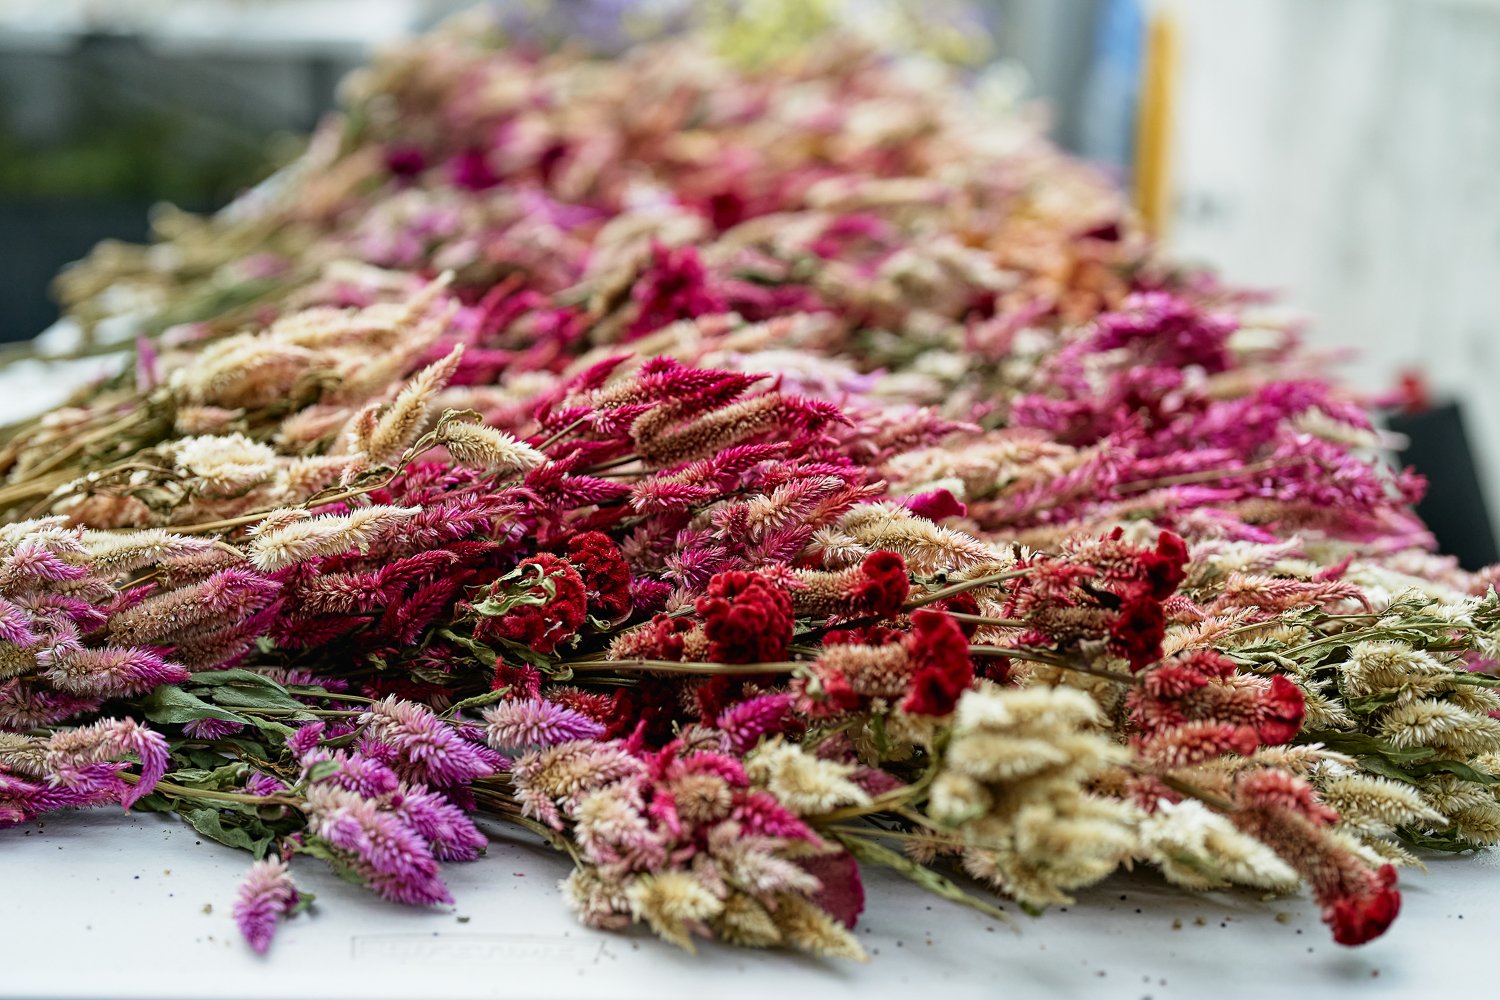
Celosia (cockscomb, wheat, and plume varieties)
Goldenrod
Strawflower
Lavender
Yarrow
Craspedia
This is a great beginner list. It’s ideal to grow a mix of “filler” and “statement” flowers. Filler flowers will be less showy but provide texture and bulk. Statement flowers often have larger blooms and are the star of the show. You should also consider the color palette while selecting your flowers.
HOW TO DRY FLOWERS
Typically, we cut and dry flowers in an ongoing routine from April to November.
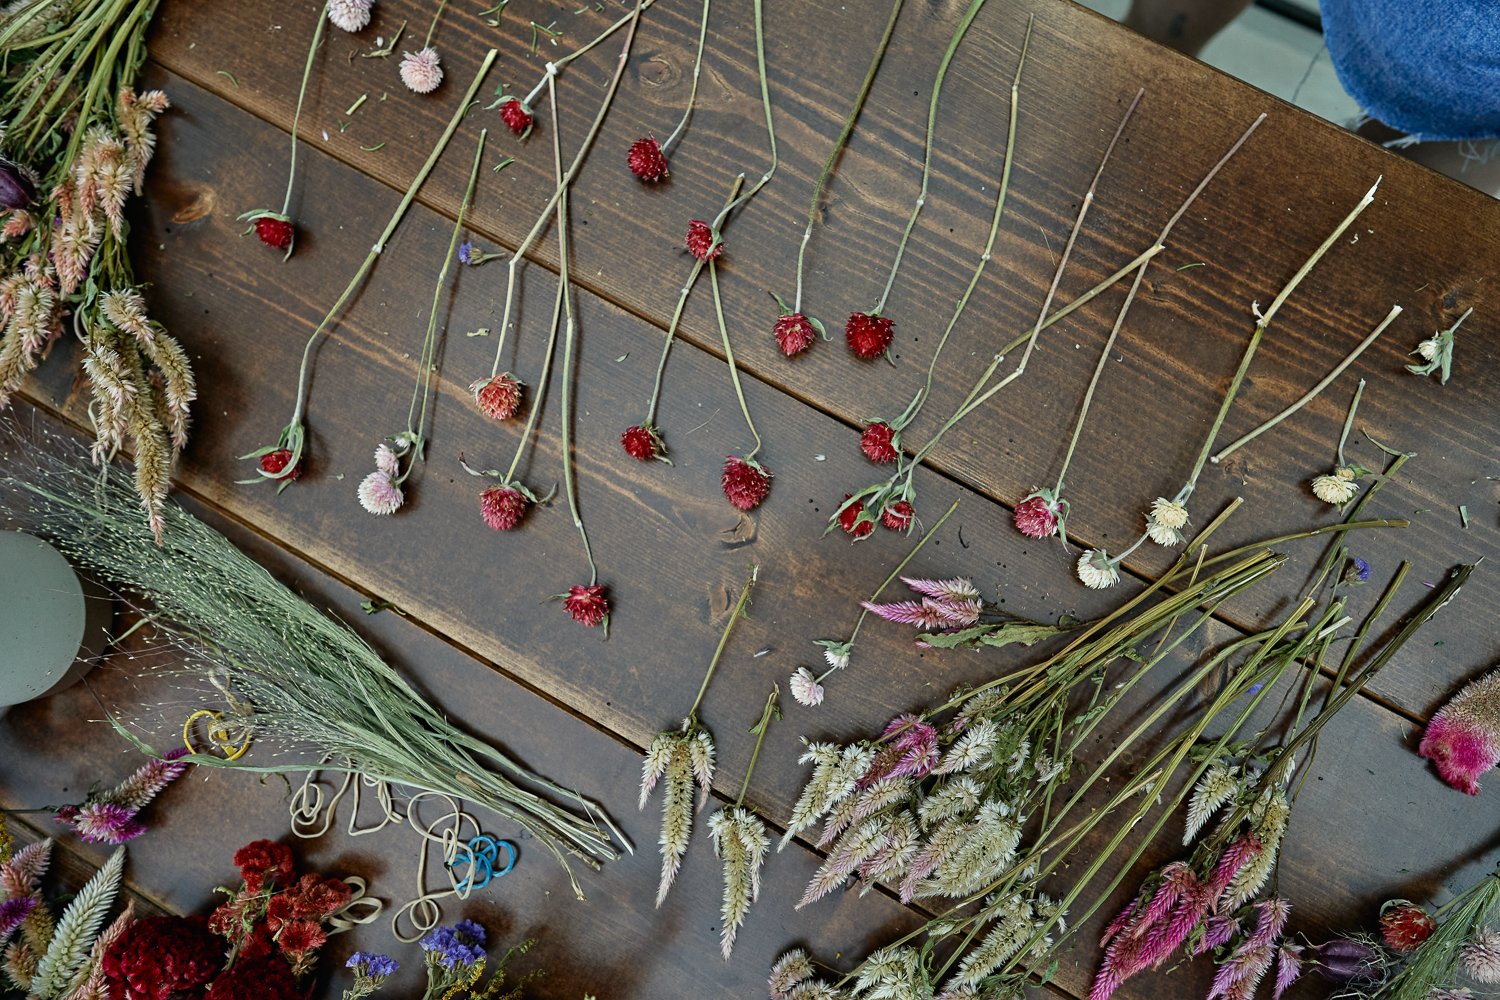
To process, cut the stems about 4-6 inches long and strip the leaves.
Use a rubber band and loop around half of the stems, twist and loop around the other half to make bunches of about 10 flowers. (Take care not to bunch too many stems together as good air flow between each flower is important to ensure successful drying.)
Hang bunches upside down from a string, spaced a few inches apart. A well-ventilated, warm and dry environment away from direct sunlight is ideal to hang dry these flowers.
Depending on the type of flower, it takes about 2-3 weeks to com- pletely dry using this method. You can tell when the flowers are fully dry if the stem snaps easily.
To prevent the flowers from shedding and dropping seeds, you can spray each bundle with hairspray 2-3 times.
STORING DRIED FLOWERS
Store in a dark warm place, avoid extreme cold or heat, exposure to the elements, and ideally no sunlight whatsoever to maintain the color of your blooms. Store finished flower bundles in a container of your choice (we use large plastic storage containers) and layer in newspaper to prevent flowers from drawing in moisture from air.
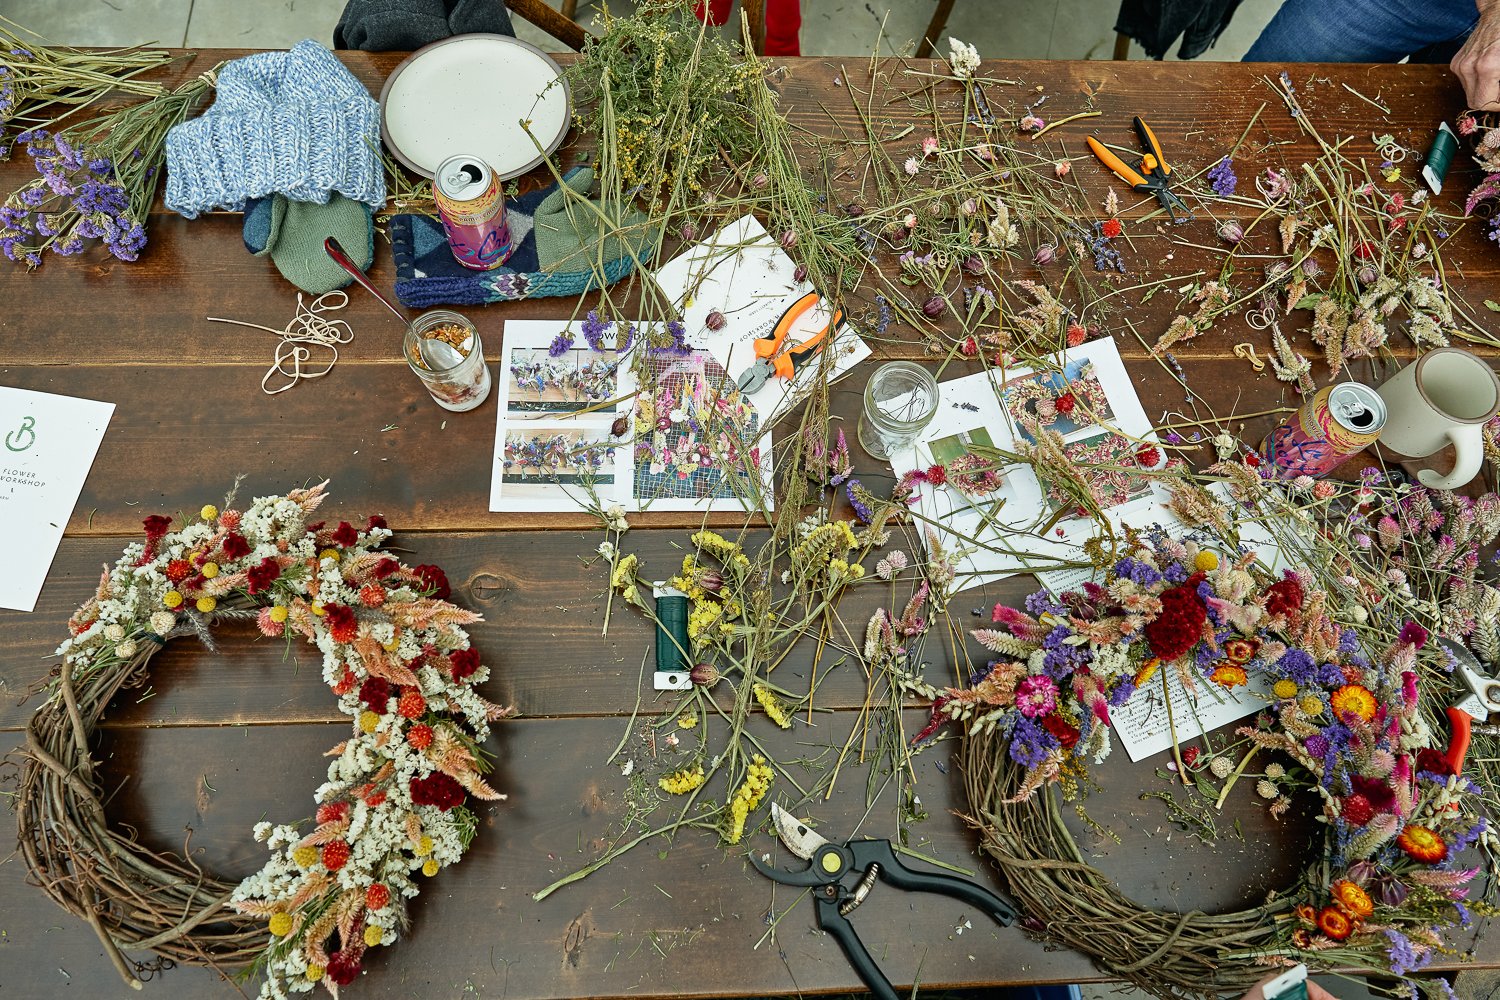
MAKING FLOWER WREATHS
Supplies:
Grapevine wreath frame
Florist wire
Wire snips
Flower pruners
Dried flowers
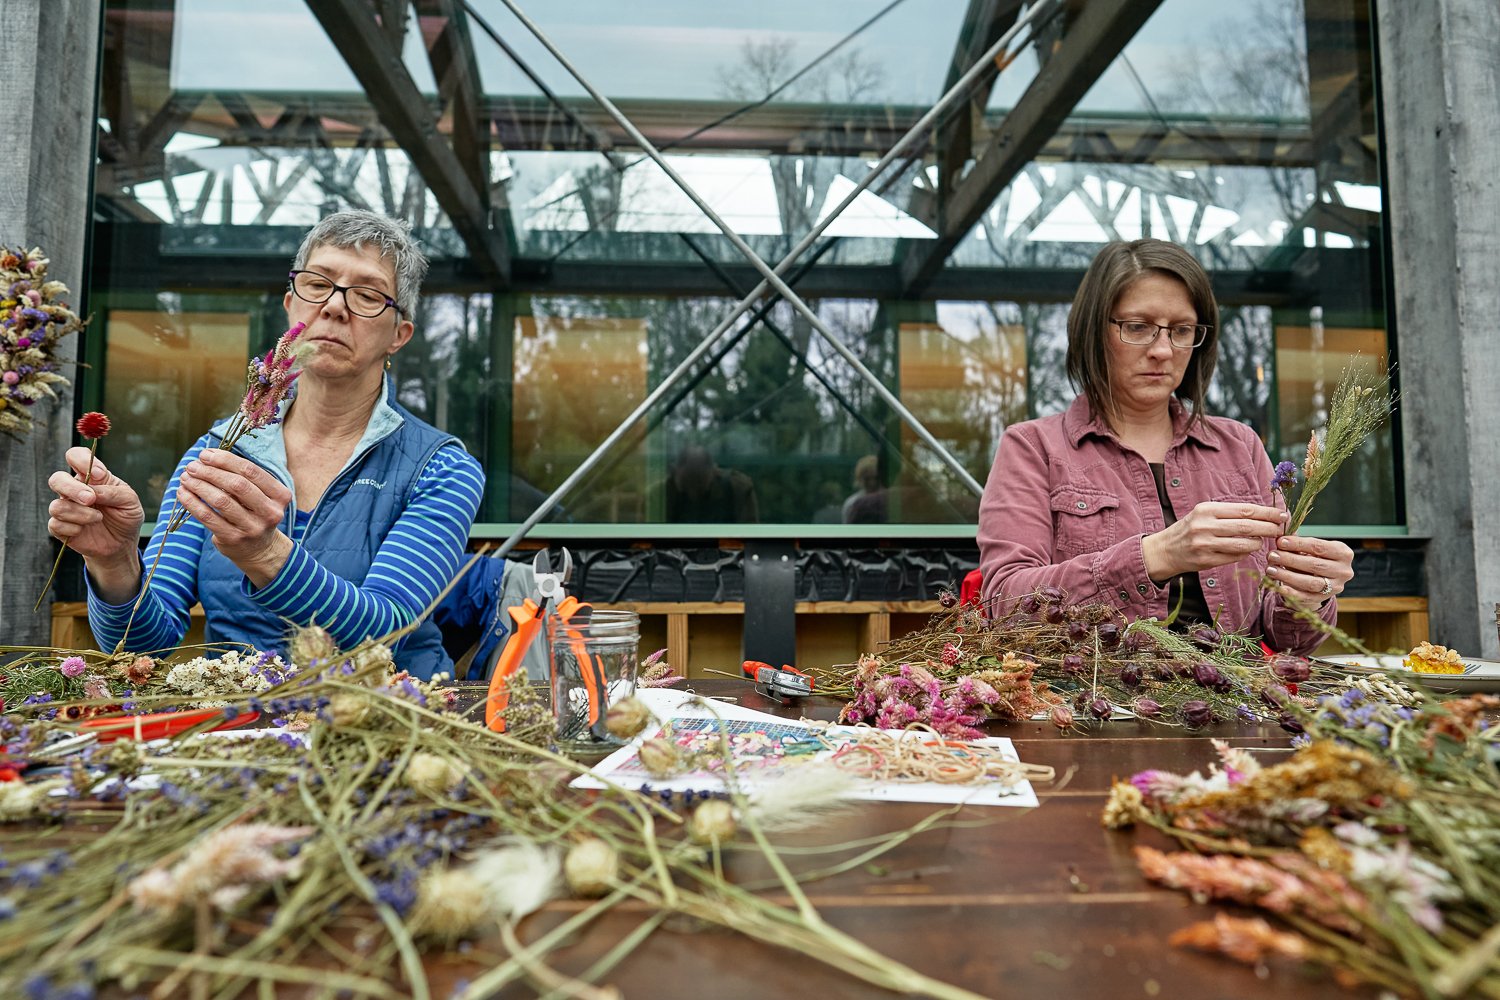
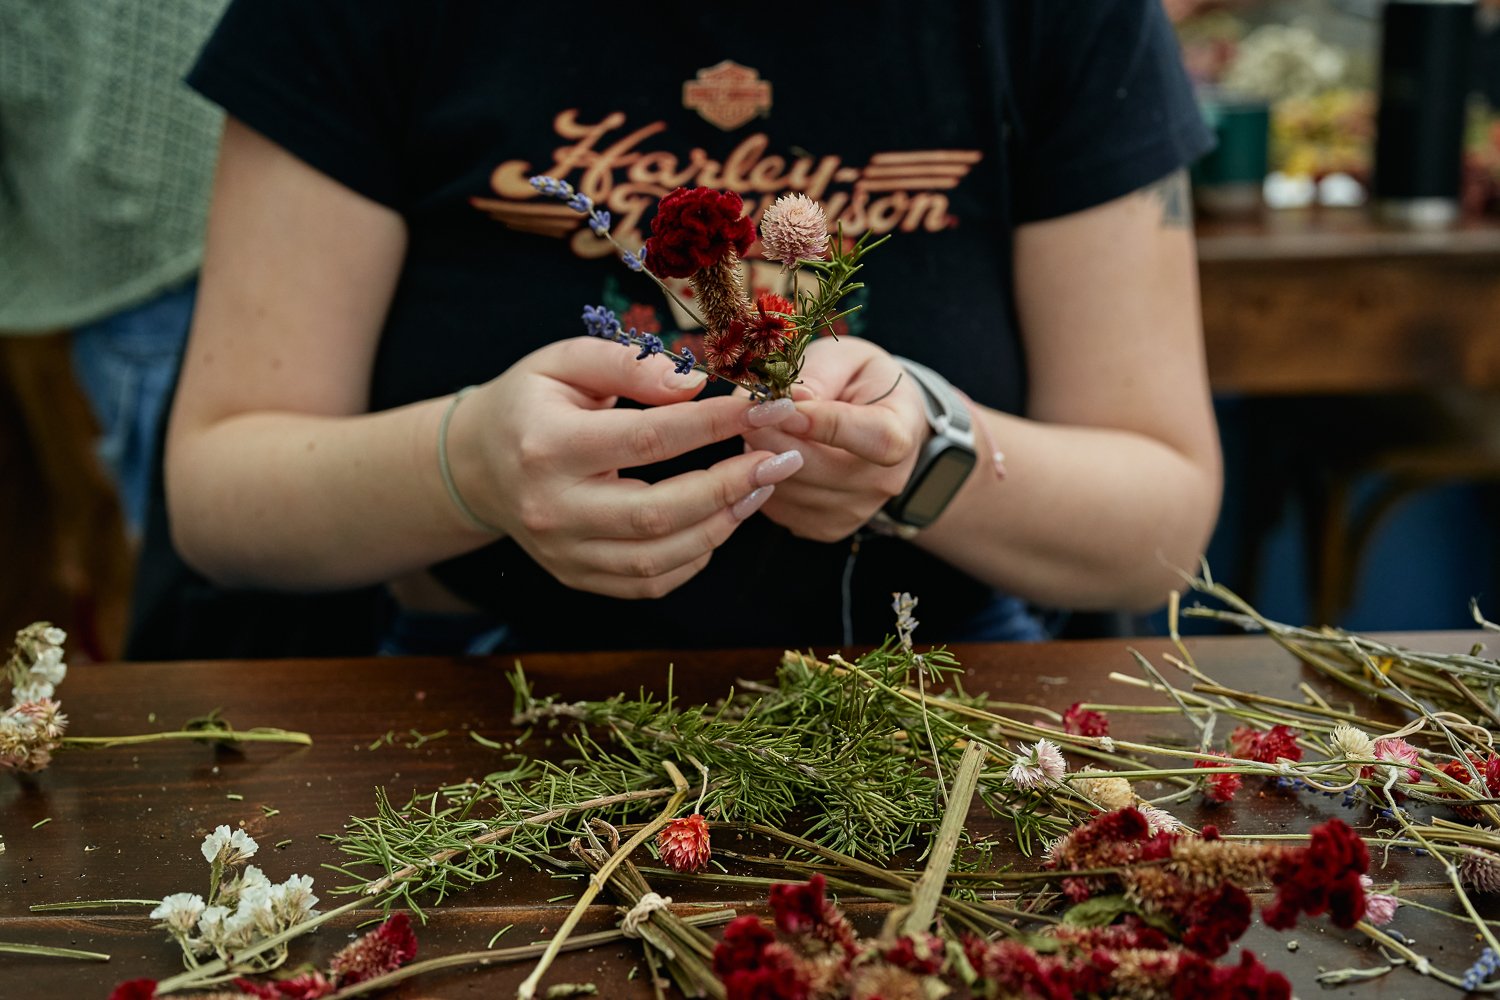
Pick and Prepare Your Dried Flowers
Decide on 4-6 different varieties, selecting based on preferred color and texture combination.
How much do you need? It will depend on your wreath, but roughly you’ll need about 120 -150 stems total.
Some flowers are very branchy and have multiple blooms on one stem; for these, break the side shoots off so we can use both the main flower and the side shoots when creating our flower bundles for the wreaths. Remove any excess dried leaves that we don’t want in our finished wreath.
When you’ve selected your flowers, lay them out on your workstation, organized by type.
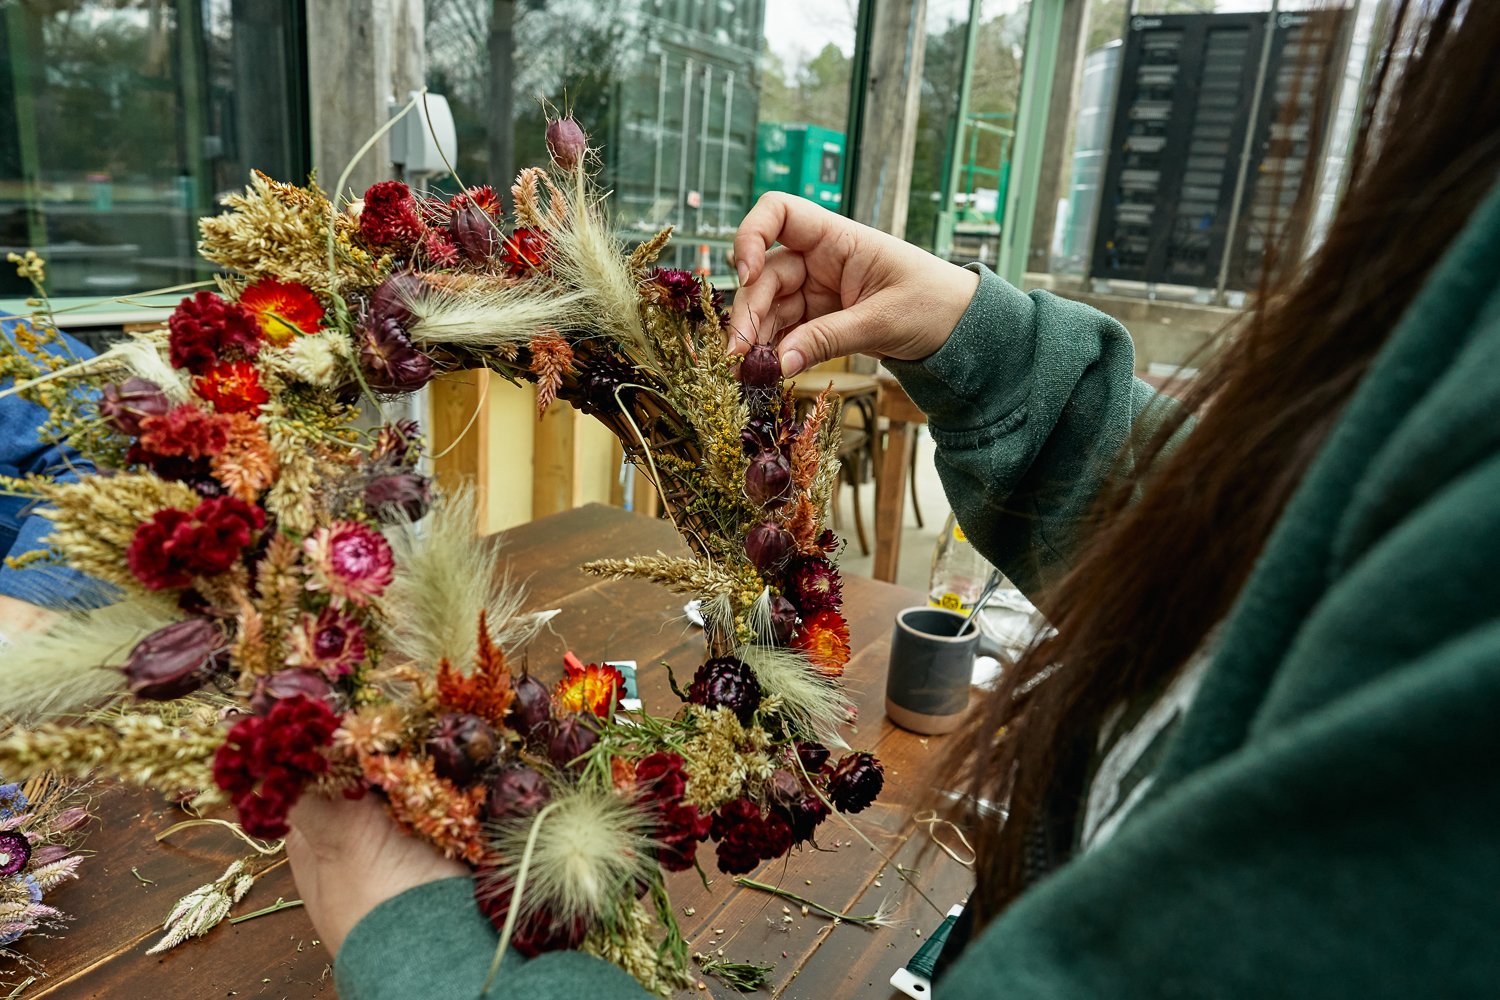
Make Flower Bundles
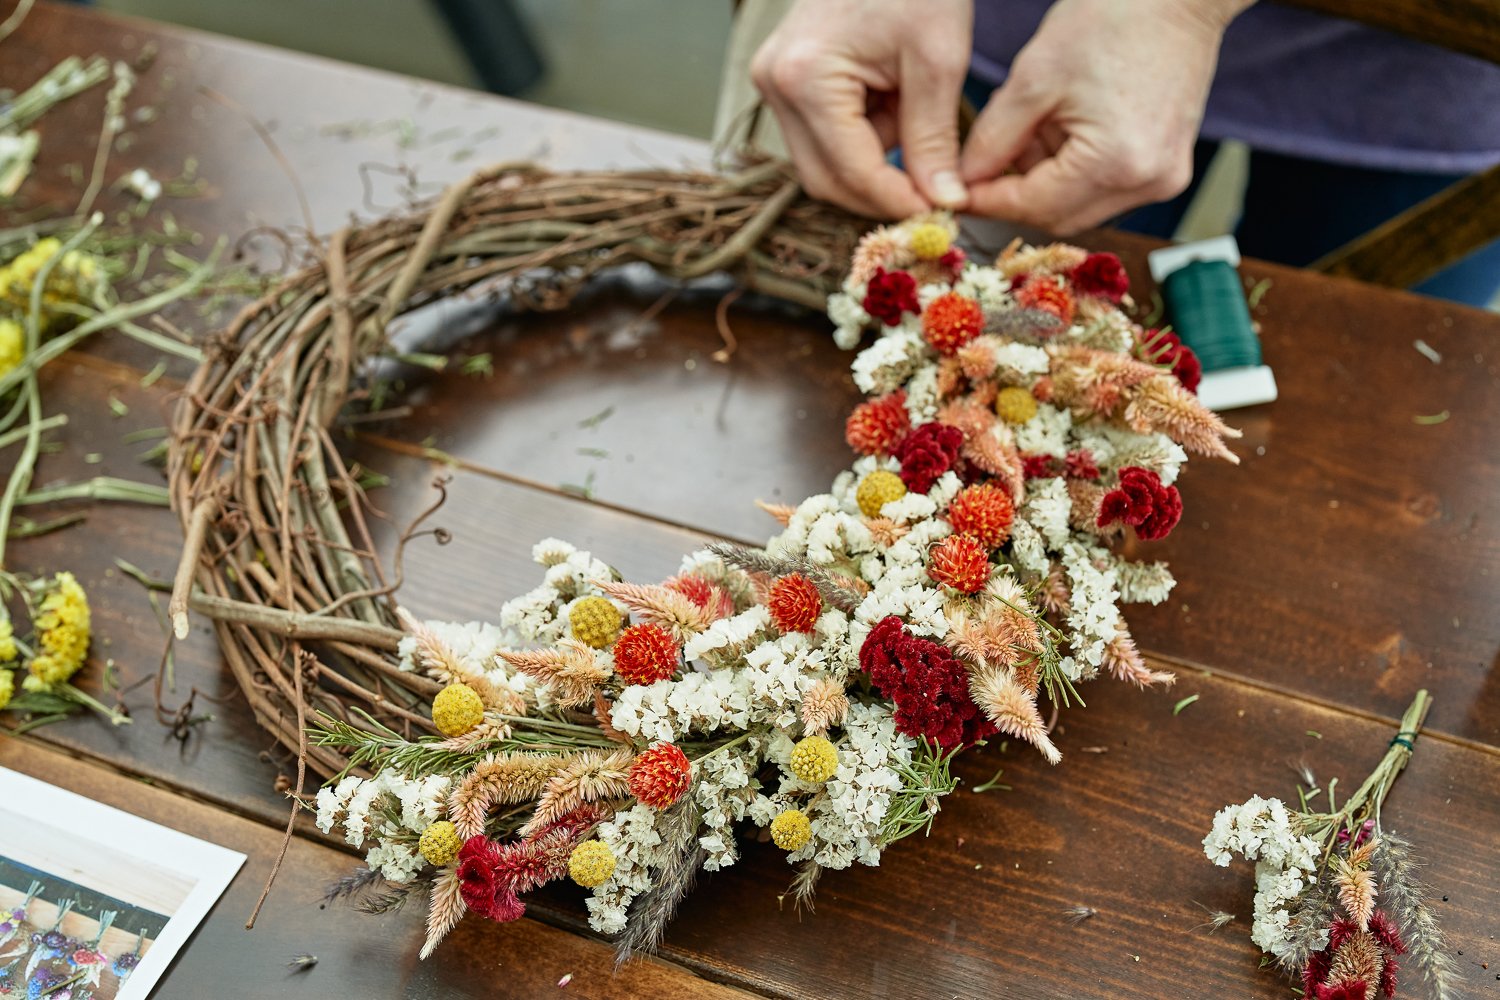
A “bundle” is like a baby bouquet - build little combinations of 3-6 flower stems that you’ll affix to your wreaths. Each bundle should have most, if not all, of your flower varieties.
To arrange the bundle, trim your selected stems to 4 inches long (in- cluding the bloom). Design your flower bundles to be flat and viewed from one side since we are attaching them to a wreath. Start with a larger filler bloom; most of that flower will be covered by the next flowers you add to this bundle. As you continue adding flowers, they should become more focal. Add small flowers in the front. Once your bundle is finished, tie it together using a bit of florist wire. Continue building bundles that are consistent in size and combination. You will need about 20 to 30 flower bundles that are uniform in size.
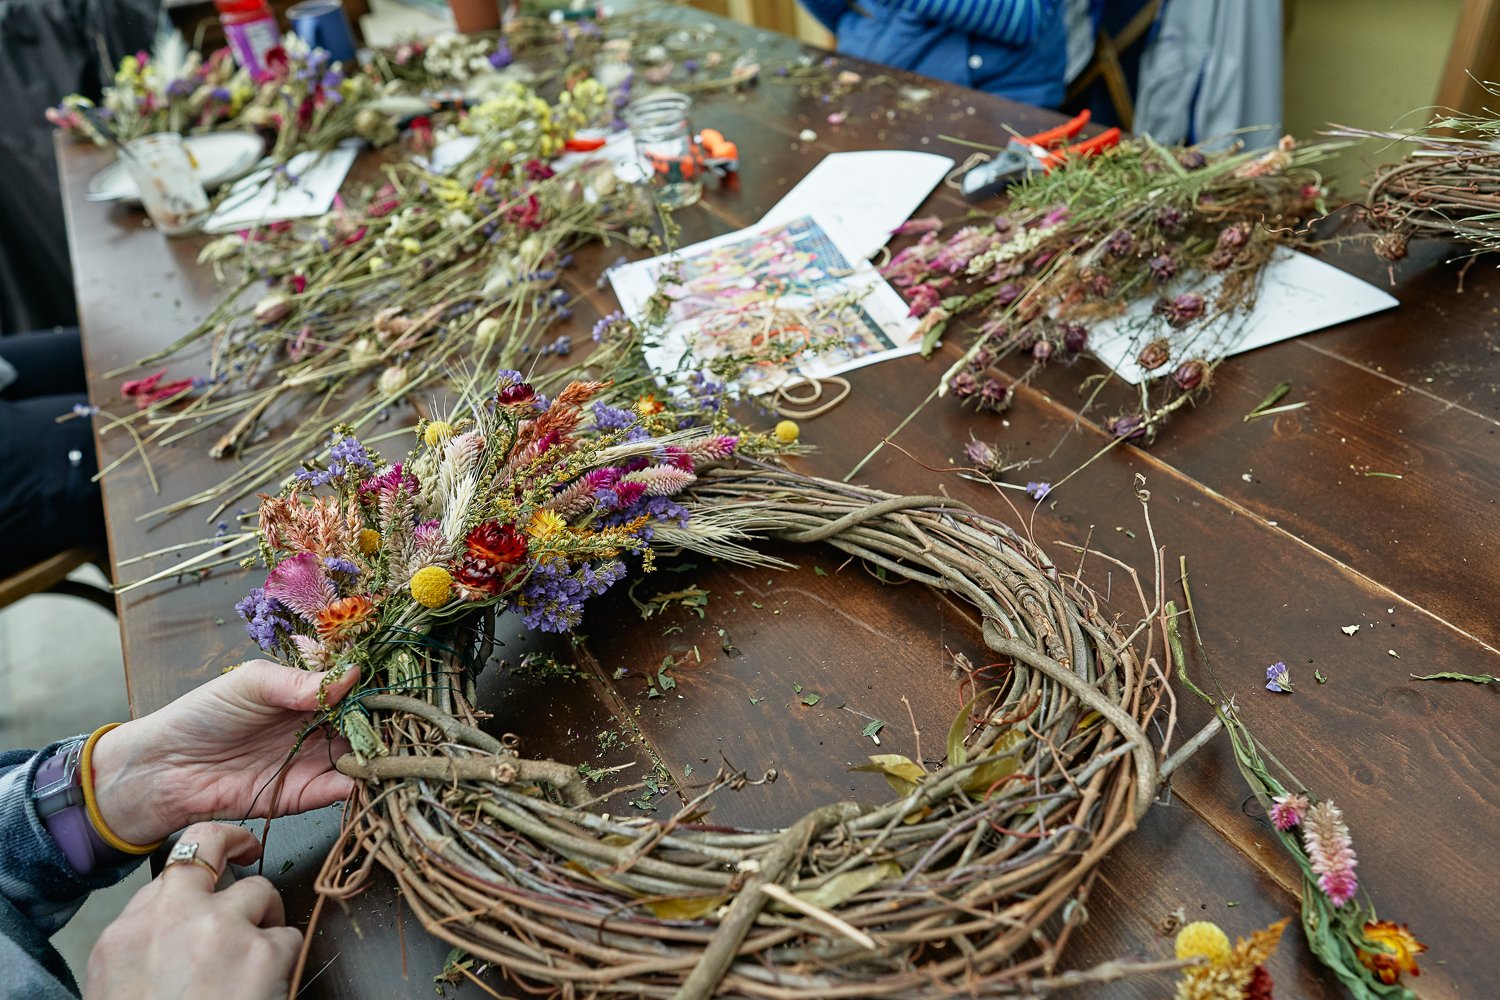
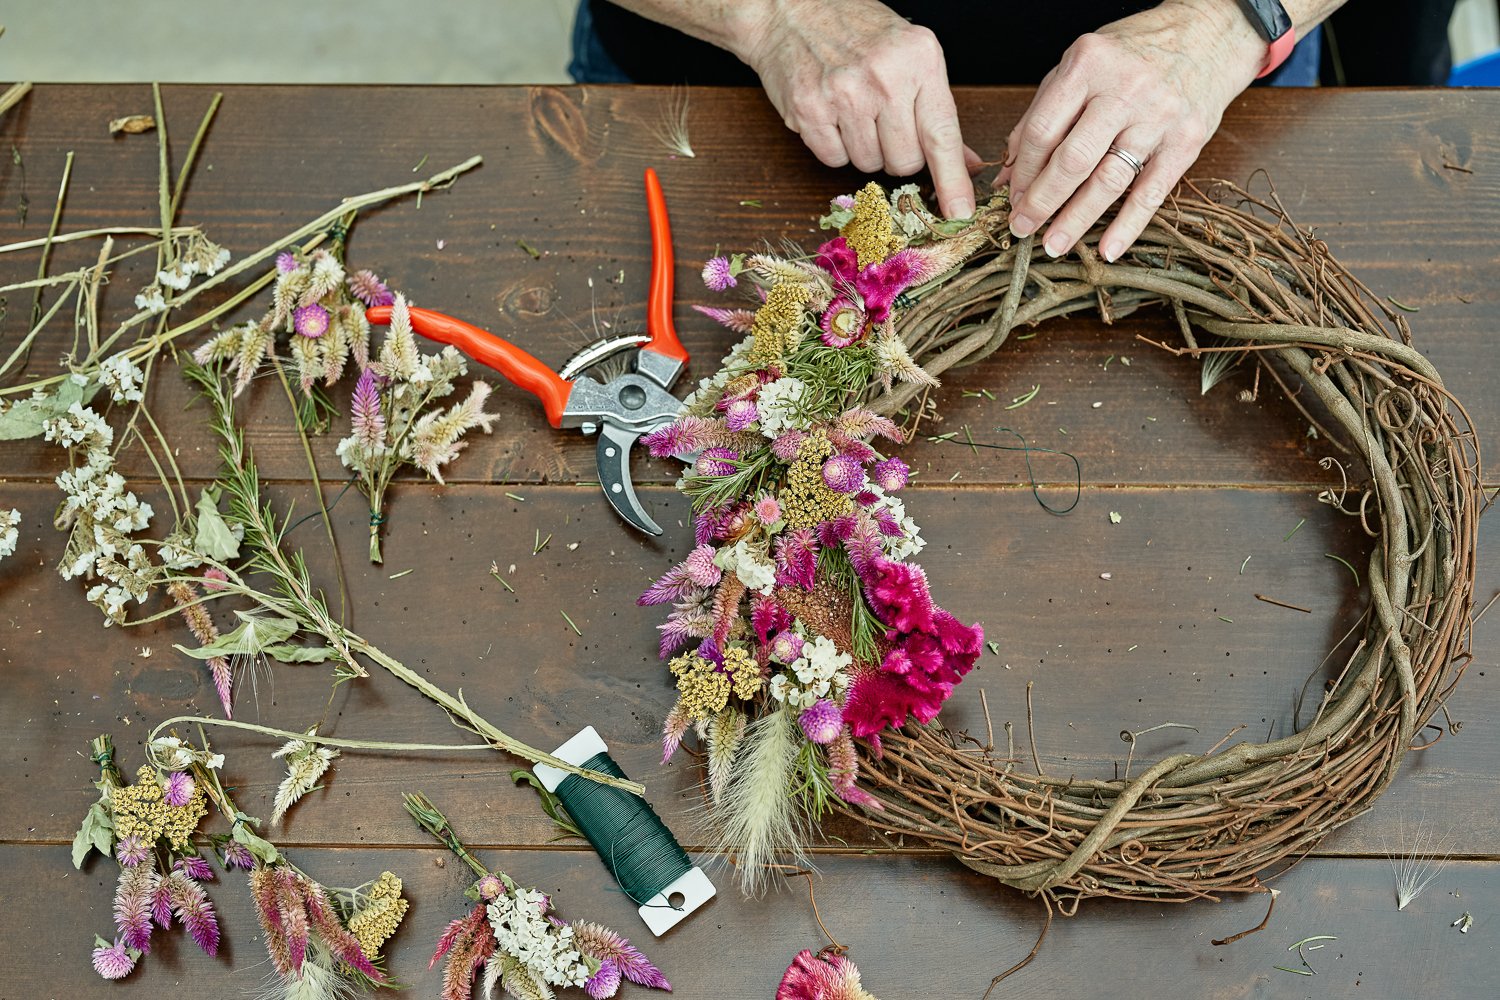
Attach Bundles with Wire
Place the first bundle where you’d like to attach it to the wreath. Affix the bundle to the wreath by wrapping florist wire around both. (Don’t cut the florist wire between bundles, you’ll just keep wrapping as you add more.)
Continue to add one flower bundle at a time, repeating the same wire wrapping process, until you use all of your bundles. You want to place your bundles so that there is some overlap and no exposed stem; this will create a continuous look. This process is similar to putting togeth- er a puzzle; pick a bundle that will sit well with the bundles around it while emphasizing the focal blooms. If the first bundle you try to add doesn’t fit well, swap it with a different bundle.
Final Adjustments
Once you have wrapped your bundles around the wreath you’re nearly done! Cut the florist wire from the spool, leaving a few extra inches
of length, and then use the extra wire to finish securing the wire to the wreath. At this point examine your wreath: are there any gaps that need to be filled? You can use any extra bundles or flowers to fill in gaps. You can also stick some individual flowers into the wreath if certain areas are bare. After making these final adjustments you have finished your dried flower wreath. Hang it somewhere out of the elements and avoid direct light for long lasting colorful blooms.